
Page 51 - Lighting the Un-lightable Volume 1 #3
P. 51
Lets analyze the scene:
So, lets get started with out analysis. If you are familiar with our methodology, you know that wherever we are and what-
ever we are doing, we always ask ourselves five basic questions - these questions tell us everything we need to know about how We had three strobes - all were 500 watt/second. We had a
to set our cameras and how to light a space. beauty dish - essentially a round sphere with a reflector inside
1 What Day is it? March 21, 2014 under the diffuser panel - a 1'x3' soft box that was very shallow,
2 Where am I? Vegas. 1 and a large and deep 3'x4' soft box. Given that we couldn't ob-
3 What time is it? It was about 1:00 PM - there was no sunlight since we were in a conference hall. scure the view of the audience, we had to find a way to light the
4 What is the angle, direction and intensity of light? The only light was directly down from the ceiling. space without positioning a strobe directly in front of the audi-
5 What is the volume of light? This is the most critical part of the equation. The consistency of the volume of light ence.
is key to understanding the tonal range in the space where we are working. Digital cameras "see" color, or inter-
polate color based upon their perception of the tonal range. The greater the tonal range, the more problematic We covered the right and left walls with black fabric and while
the scene becomes for the camera. So, the goal is to make the volume of light as consistent as possible. It doesn't that helped control the reflection from the walls, it also darkened
matter whether the volume of light is high or low, as long as it is consistent. The volume of light was extremely 2 the space. So, addressing one problem created another. There
consistent in this scene. It was almost black everywhere - consistent but too dark to effectively create images. was nothing we could do about the ceiling. The best we could do
There were other things we needed to keep in mind as well. Throughout the day, there would be people watching us. was mitigate any negative effects the ceiling might have.
This further limited where we could place the lights. The ceiling over the area where we were working was white as well. If we
weren't careful, this would create unexpected "hot spots" on the models, or, when we were using the settee, we would lose detail,
or there would be excessive shadows to address in post processing. However doable that is, there is no substitute for "getting it
right in the camera." We were using two very different backdrops and while we
Remember too: The more "natural" a scene looks, that is the more a scene looks like it was created with ambient light, had budgeted time between sets to change the backdrops, we
the greater the emotional impact an image will have. So, whatever we did, we had to make sure we kept the shadows as natural couldn't spend too much time altering the lighting. So, once the
as possible. strobes were in place, we weren't going to be able to move them
There would be two distinct scenes as well - one would have a light colored backdrop, mostly blues and whites and grays, 3 more than a little bit.
and the other, which you can see in the photo on the previous page, was "grunge" - largely brown tones. For the grunge look we
wanted more dramatic shadows as well.
The differences between the two sets - as I noted - were extreme.
Finding a lighting scheme that would work for both would be
difficult. Changing the backdrop would significantly alter the
4 volume of light.
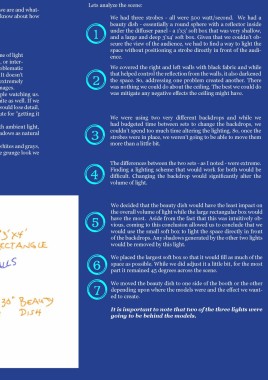
We decided that the beauty dish would have the least impact on
the overall volume of light while the large rectangular box would
5 have the most. Aside from the fact that this was intuitively ob-
vious, coming to this conclusion allowed us to conclude that we
would use the small soft box to light the space directly in front
of the backdrops. Any shadows generated by the other two lights
would be removed by this light.
6 We placed the largest soft box so that it would fill as much of the
space as possible. While we did adjust it a little bit, for the most
part it remained 45 degrees across the scene.
7 We moved the beauty dish to one side of the booth or the other
depending upon where the models were and the effect we want-
ed to create.
It is important to note that two of the three lights were
going to be behind the models.
| 51