
Page 59 - NyghtVision Magazine Volume 3 #2
P. 59
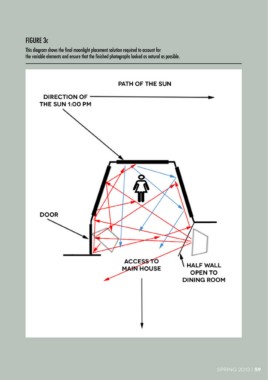
FIGURE 3c

            This diagram shows the final moonlight placement solution required to account for
            the variable elements and ensure that the finished photographs looked as natural as possible.


                                                                                                  SPRING 2013 | 59